Well, we come to an end of this whole coursework process - and I'm glad.
Here's a video illustrate how I feel (well for the most part).
Expect I won't see you again because I'm in A2 and won't be doing this again next year.
Anyway, Goodbye now!
Showing posts with label Jazzine Smith. Show all posts
Showing posts with label Jazzine Smith. Show all posts
Sunday, 29 January 2012

Monday, 23 January 2012
EVALUATION QUESTION 4 - What have you learned from your audience feedback?
Music Video
Tuesday 6th December at 12:30 all us A2 media student went to 'The Screen on the Green" to watch our music videos on the big screen.

Although I didn't catch the part before our music video actually started playing - that is because the sequence is done at random - we did get a warm welcoming applause. As you can see from the video, we did get a good reaction after our video had finished. The chorus especially received the most reaction, as people were enthused by the fact that they were seeing familiar faces, or their face, on the big screen. These audience reactions led me to believe that our music video was effective in engaging the audience, thus teaching me that the idea of including familiar faces was successful. My target audience then would be interested and engrossed in the video as they can relate to it and feel more included.
After the screening was done, I went outside and asked some people, whom I thought would be of my target audience, some questions about my music video so that I could establish what worked and what didn’t work.
Malika supported my comment about the chorus (different faces) reaching out to my audience. She confirmed that my choice of locations were good is showing the beauty of London. Most importantly, she told me that music video looked realistic/common of other music videos and that she would be more interested on the son after watching the video. Her feedback ensured me that my target audience was being attracted and interested, which was my goal.
Zahra gave me a lot of feedback. She agreed with our choice of shots, our costume and our locations – which were all chosen in attempt to show the beauty of London. She also acknowledged our amplification structure of which is why we went from night to day. According to Zahra editing was effective, especially the chorus, it was just enough and was also kind of humorous. From this I learned that my music video was effective in reaching my target audience through editing, mise – scene and camera shots.
Jade informed me that my first shot set the scene really well and it evoked anticipation in the audience – as Dan told us it would before – that was really good. However, she also told me that the costume let my video down, and I understand this. If I were to do this video again I would change the costume and make her more stylized, to make it more conventional of a music video. We chose that costume because it was floral, but we could have still stuck with the floral idea and still been more extravagant and eccentric – as most music videos do. For example, in Katy Perry – California Girls Katy Perry was very stylized wearing a costume that over exaggerated her theme or candy.
With the locations, she informed me that the wide range of locations was a good choice and she got what we were trying to generate to our audience – the beauty of London through lots of different locations. She also understood the message behind the chorus – they beauty of London through the diversity in it. Her feedback inferred the success of our music video, however her feedback also enlightened me to the fact that the stylization of the artist is vitally important as in some ways it could make or break a video.
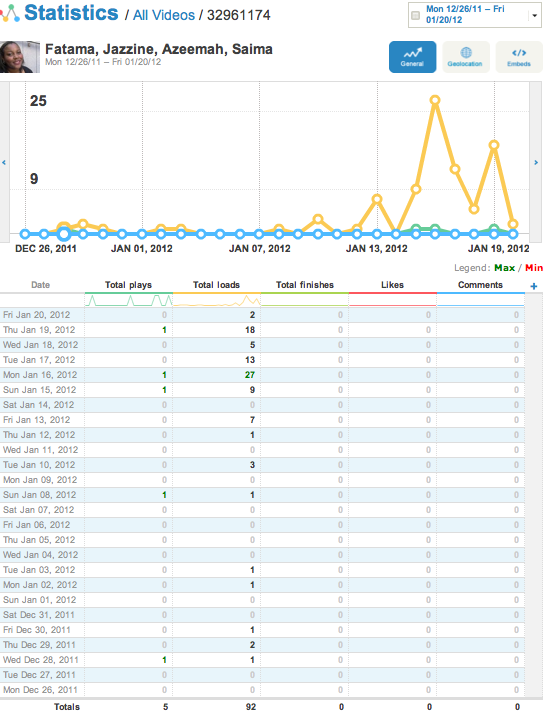 |
| Response on Vimeo |
Ancillary
I interviewed Chloe who is not a media student. When asked about any visual links, she was able to recognise the guitar and the colour scheme as a visual link throughout my digipack and also realized that it linked to my video and complemented that the choice of colours were well chosen. She felt that my goal to portray the guitar as an important aspect was successful.
However when asked about the costume, similar to Jade, she felt that the costume let us down. She explained that it could in a way be acceptable as it makes my artist more relatable, but she then went on to say, as I said before within Jade’s feedback reply, it’s conventional for artists, especially on their digipacks, to be heavily stylized.
As I agree the front cover, as she noted, “can look a bit boring.” This because it’s very plain and bland, so if I were to do this again I would think of trying to be more creative with the front cover – not so much in terms of the images or props, but the design and graphics on it, to make it that little bit more eye catching.
She informed me that she felt that the best panel was the back panel, because it was very creative and looked good on the page contrastingly she felt that the inside left panel lacked creativity, thus labeling that panel as her worst panel.
Overall she advised that biggest improvement could have been the costume – which I totally agree with.
Sorry about all the noise in the background – it was immediately after lesson, so a lot of people were still in the room and more were coming in for workshop.
Questionnaire of promotional package
To gain more feedback for both my promotional package I composed a questionnaire and generated it to both media and non-media student to gain a more general view by asking people who are not aware of things through a 'media eye.' A questionnaire is a good way to gather feedback because I am able to collect both qualitative and quantitive data.
This was my questionnaire:


These were the results:
Most of my participants were female and between the ages of 16-19 and listening to mostly Pop, R&B and Grime.

The main message behind the music video was about the beauty of London.
a) On a scale on 1-5 how accurate was I portraying that message through my use of:


Generally the feedback of the thing that they thought worked best in the music video was the chorus of different faces. My feedback of the things that worked least in the video were; costume, the lip sinking, and the artist's performance as some said they lost interest towards the end because of this.


My responses to the think that worked best in the ancillary were mostly the girl sitting on the guitar. Other responses included the incorporation of the colours and just the colours. On the other hand the they mostly felt that the weakest thing was the costume.


In conclusion the thing that I believed worked best in the music video and ancillary as a whole was the prop of guitar because this set me out from the rest. What worked least me was similar to the opinions to the audience – the costume. Therefore if I were to do this project again I would try to make the link between music video and ancillary even stronger by drawing more on the prop of the guitar in my music video so the prop dominance is equally as that in my ancillary, as this is what my audience feel worked best in my ancillary. Also, to hopefully decrease those statistics of people that wouldn’t be more interested in the artist and her music after seeing the music video and digipack and advertisement, I would recognize the vitally of the artists stylization. As this appeared to be a significant fault, next time round I would put more into her image and trying to portray her as a music artist, rather than an ‘ordinary person.’ Another thing that I’ve realized was lacking is the artist performance. I do notice that she does get more fed up with the video as it goes along, and this was probably because the whole construction became tedious for her, and she maybe wasn’t so enthused because it’s not her work, so she won’t feel the need to push herself. The avoid this problem next time round, I would chose the artist that is within my group, so that they don’t become unmotivated, and also I would try to keep the artist more interested by not packing on work too much but filming in acceptable amounts, so it doesn’t become over bearing. In order to do that I would have to be VERY well planned.
Although I didn't record it, Dan did mention to me that my artist on my front cover was too small with might make her harder for a shopper to identify her. This criticism I believe is true. The fault lies within the picture of the guitar, I took that picture at a wrong angle, so they guitar looked too big. I notice notice it until I was trying to put my artist on the guitar but I couldn't do anything about that because I didn't have the guitar anymore. To avoid a similar problem in the future, I would take more alternative pictures of the guitar and also be more planned so that I schedule in a date where I could take the guitar again in case my pictures didn't turn out so well.
Lastly a main issue of my promotional package is that my target audience is a bit too specific, and it is harder for my products to reach people outside of my target audience. This is a big problem because her music and image is being very refined, thus her promotion is not as successful as it would be if the products reached a more boarder audience. Therefore to me more successful next time round I would try to included elements in my promotional package that can entice a wide, diverse audience, for example I would included conventions that are found in other genres not just pop.
Although I didn't record it, Dan did mention to me that my artist on my front cover was too small with might make her harder for a shopper to identify her. This criticism I believe is true. The fault lies within the picture of the guitar, I took that picture at a wrong angle, so they guitar looked too big. I notice notice it until I was trying to put my artist on the guitar but I couldn't do anything about that because I didn't have the guitar anymore. To avoid a similar problem in the future, I would take more alternative pictures of the guitar and also be more planned so that I schedule in a date where I could take the guitar again in case my pictures didn't turn out so well.
Lastly a main issue of my promotional package is that my target audience is a bit too specific, and it is harder for my products to reach people outside of my target audience. This is a big problem because her music and image is being very refined, thus her promotion is not as successful as it would be if the products reached a more boarder audience. Therefore to me more successful next time round I would try to included elements in my promotional package that can entice a wide, diverse audience, for example I would included conventions that are found in other genres not just pop.
EVALUATION QUESTION 3 - How did you use media technologies in the construction and research, planning and evaluation stages?
Here's a video of me answer question 3 :)
JVC Cameras – Because we wanted to get the best quality images we used JVC cameras, which are HD. The camera allowed us to capture motion images and audio. We used the audio recording to mark the words that the artist is singing to the audio on Final Cut Pro.
Final Cut Pro – Through this I could add in videos and blend different scenes together with effects like cross fade for seamless transitions. I could also add in an audio, them mark to beat so that I can cut the music to the beat and make one music video.
Photoshop – Photoshop contains tools that enable me to cut out the artist from the background and place her onto the guitar. To add realism, I painted in the shadows and added in the Gaussian Blur to soften the edges.
On my inside left panel to get that wall background I got a grudge texture off Google, then drew lines for perspective then faded out the grudge texture so that its not so clear so that we can get the feeling that she is leaning against the wall.

EVALUATION QUESTION 2 - How effective is the combination of your main product and ancillary texts?
I answered question 2 using Beeclip, which is a type of interesting and fun presentaion.
Sunday, 15 January 2012
Thursday, 12 January 2012


Wednesday, 11 January 2012
Making the Inside Panels
For my inside left panel initially all I wanted was a close up shot:

But after I took the pictures a second time with Renee I had done more research and plane exactly what type of shot I wanted, because when I went to took the pictures the first time, the close up shot was the hardest picture to take, I thought the shot would just come to me. But it didn’t. So the second time instead, I went after the picture.
The picture I liked best for this panel is this one:

Remember my idea for this picture was to put the floral graphics on the floor where she’s sitting. So I cut her put in Photoshop, and then added in a wall by drawing i lines then inserting a grudge texture picture from google,
so it looks like she actually sitting. Then to do the floor, it was the same as with advertisement and the font – copy and paste.
This is how it looks so far:

 |
| Grudge texture |
This is how it looks so far:

My initial idea for my CD housing I was quite satisfied with so I just went along with that idea, which was this:

I used this picture

Then cut it, added the shadows...

and also copied and pasted the final font from my advertisement.
After everything as done I went through my digipack and coloured everything in.
P.S. if you noticed that I'm not posting up the completed panels, thats because I wanted to save it all till the end and not diminish the effect. :)
P.S. if you noticed that I'm not posting up the completed panels, thats because I wanted to save it all till the end and not diminish the effect. :)
Tuesday, 10 January 2012
Making the Advertisment
This was my mock up of my advertisement:

And was these were the pictures I wanted to use for it. So placed them into Photoshop and cut them out.


Before I put I fixed up the image in terms of shadow and position, I wanted to put the text I first. So, as the same when doing the back panel, I made a document with the same measurements as the advertisement in Photoshop – which was much simpler this time because it was just an A4 piece of paper.
 |
| Guitar and artist in Photoshop |
 |
| Guitar and artist in InDesign |
Insert picture
I copied and pasted the text in from Word, then changed the font to American Typewriter.

I look at some more album promotion poster and came across this one:


I liked the way Eminem put all the writing in one corner like that because it gave more focus on the picture, and I wanted to achieve this, so I tried to imitate this:
 |
| I still think it needs a bit more work, but I’ll tweak it more when I add the pictures for the record label, distributor, available places to buy the album from. |
After I went back into Photoshop to try and now properly focus on the picture. I added in shadows around her feet and fingers - the same way i did for my front cover.
 |
In the picture i have already added in the pictures for the feet and am doing the shadows for the fingers. |
However, when I put it all in the corner I was left with a place space in the middle. Coincidently, I stilled needed to include the floral graphics on the advertisement to make it more linked to my digipack, and that empty space was the perfect place to put it. So just like how I did with the new font, I copied and pasted pieces of the floral graphics and old font and tried to creatively put them together for the advertisement.

This is how my advertisement looks so far (it’s basically finished):

Monday, 9 January 2012
Reconstructing the Font
As I mentioned in the previous blog, Rebecca advised my that my current font does not work. So, as I said, I went home and did some work on it. After asking my family to give my their advice as an audience, I decided that I might just be best getting a whole new font. I went onto a website called
dafont.com and found a font that I liked and I think went with my genre called ‘Dutch and Harley.’ This font came with Glyphs that I could use to add some design to it, and it suited the floral graphics that I wanted to use in my digipack. So I downloaded it.
This what the font looked like when I typed Alex into the website to try out the font:

It doesn’t have a capital A.
I constructed the font in InDesign because I was writing in the font of my advertisement anyway. After I wrote out the name on my advertisement, I went onto Type-Glyphs, to get the designs that came with it, because otherwise the font didn’t look nice, or captivate the theme of my digipack.

I basically had to be creative and try to discover what will work and what wouldn’t work. With what designs the font gave me I was able to come up with this:

But it wasn’t enough. This is where my old font came in handy. I was able to use some of the floral drawings off the font and add them into my new font. To do this I just selected what I wanted to use in Illustrator, then simply copied and pasted it into InDesign.

This is how it looked in the end.

I was happy with this because I still enable for the floral idea I was heading for, and it stood out very well from afar-which is what Rebecca said my other font lacked. Also my old font wasn’t a complete waste of time. I now just need to some this to a teacher and see if I have their approval.
Making the Front Panel
The pictures I went to take with Renee the first time didn’t really turn out so well hence I ended up not being able to use much. That’s why I had only had the back panel so far. After I went to take my pictures again I was able to move on with my digipack. The next section I attempted was the front panel.
My mock up idea for my digipack was this:

So I put this picture of my artist on the front cover: (Insert picture) and then cut my artist out the background.
 |
I decided on this picture because in the other potential shot for my font cover, it looked like she was uncomfortable. In this picture she looked more relaxed and I liked the way her arm was leaning because when I put her on the guitar it looked realistic. |
 |
| This was the front cover as just after i put the image in. |
 |
I tilted her to make it look more as if she was sitting on the guitar and pushed her a bit further back. |
The next thing I had to do was to add in shadows so it looks as if she is actually on the guitar, rather than that I just copied and pasted a separate image. I had to look at her and see where the direction of light was coming from. When I discovered that I was coming from the right I used the paintbrush tool and softly drew in some back lines.

To make the shadows soft I had to after change the opacity of the markings.
 |

Also used Filter – Blur - Gaussian Blur and change the radius of the blur to suit the desirable shadow placement to make it actually look like shadows. I used Gaussian Blur so that I could give the shadows a fade to have a soft edge and not so hard. The shadows make the image also look more 3D. In the end I put in shadows for legs, fingers, leaning arm and where she was sitting.

 |
| Adjusting the Blur |

After putting my artist on the guitar I added in the font to see had it would work with it.
 |
Here the font looks faint and it doesn't stand out as much as it needs to |
So I used the effects in Photoshop to try make my font stand out more.

 |
| I played around with the different font styles to see which one worked the best. I chose Outer glow because it make it come off of the page more and helped it stand out. |
But I didn’t think that was enough.
 |
| I continued to played around and added the Bevel and Emboss effect because it really allowed the lettering to stand out. |
This how it looked like when I was done and had added in a few of the floral graphics.

However, I showed Rebecca what I done with the font today in class and she informed me that she didn’t believe it stand out enough, and I agree. So I am going to go home and try out more effects and see if I could somehow make the font work conventionally, then asked a teacher advise on the improvements.
Subscribe to:
Posts (Atom)